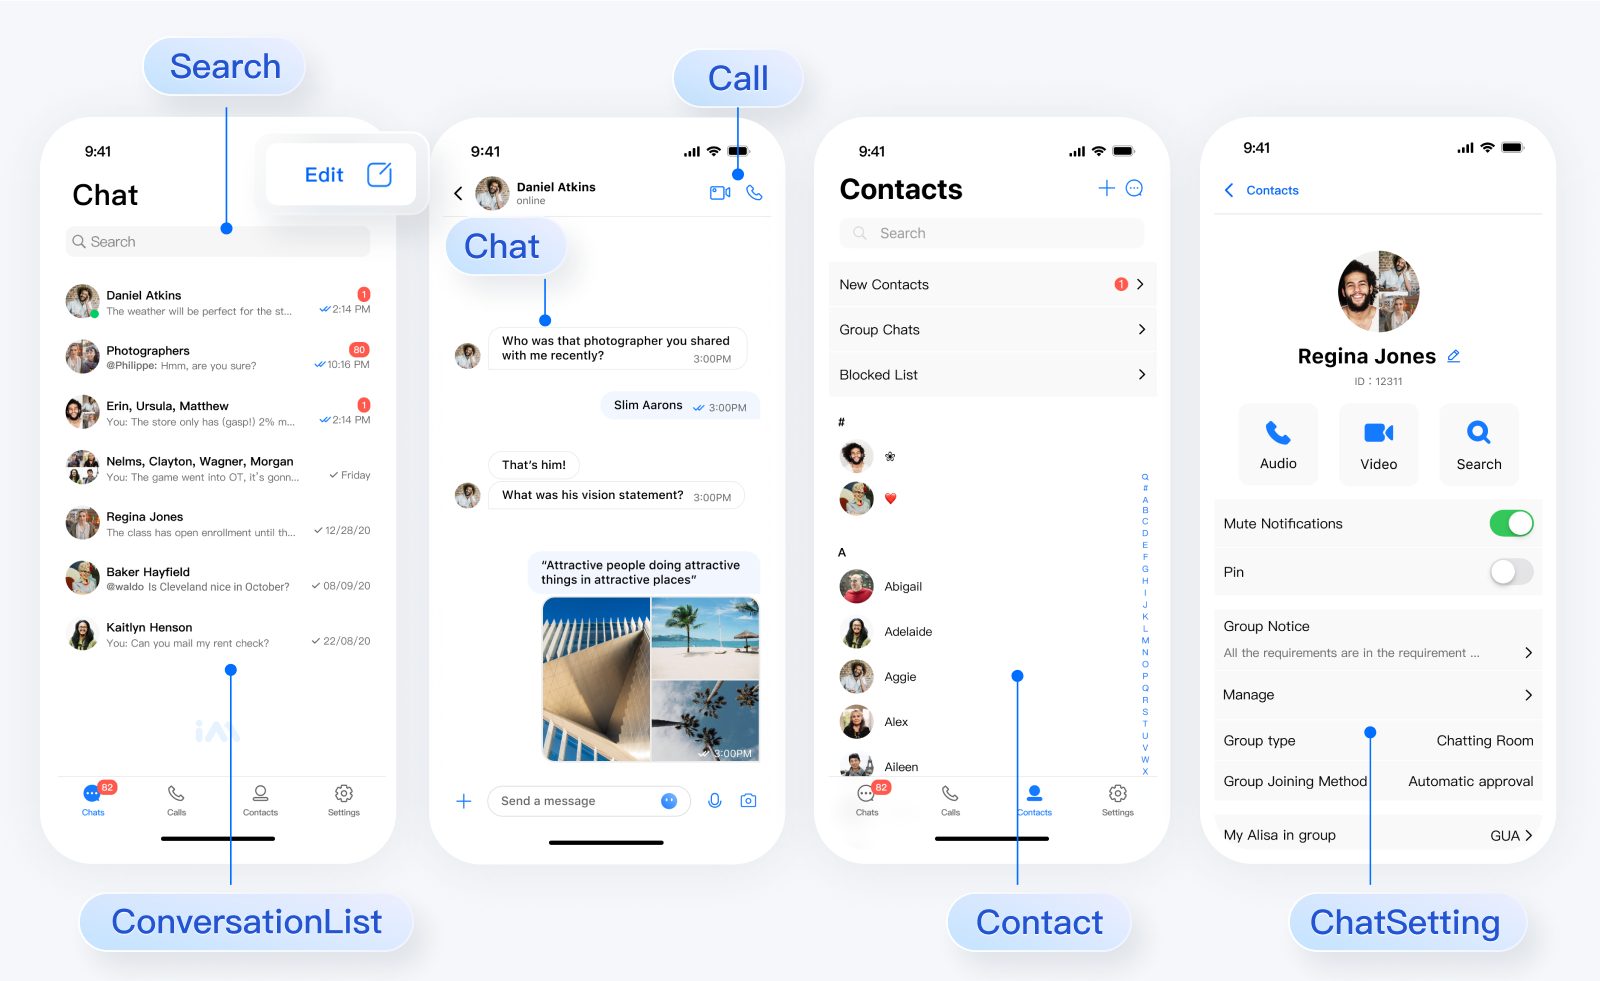
chat-uikit-react-native is a React Native UI component library based on Tencent Cloud Chat SDK. It provides universally used UI components that include ConversationList, Chat, and Group components. Leveraging these meticulously crafted UI components, you can quickly construct an elegant, reliable, and scalable Chat application.
Important
In respect for the copyright of the emoji design, the Chat Demo/UIKit project does not include the cutouts of large emoji elements. Please replace them with your own designed or copyrighted emoji packs before the official launch for commercial use. The default small yellow face emoji pack is copyrighted by Tencent Cloud and can be authorized for a fee. If you wish to obtain authorization, please submit a ticket to contact us.
submit a ticket url:https://console.tencentcloud.com/workorder/category?level1_id=29&level2_id=40&source=14&data_title=Chat&step=1
In this tutorial, you can build a free chatting application in just 10 minutes by integrating chat uikit using react native

If this is your first time developing a React Native project, refer to the React Native official steps set-up-your-environment to configure the development environment.
If you encounter environment problems when creating or compiling the project, you can run npx react-native doctor for environment diagnostics.
git clone https://github.com/TencentCloud/chat-demo-react-native.gitcd chat-demo-react-native/Demoyarn installnpm i --legacy-peer-depsSet the relevant parameters SDKAppID and SECRETKEY in the example code of the debug/GenerateTestUserSig.js file:
SDKAppID and SecretKey can be accessed by the Chat Console:

To compile and run the project, you need to use a real device or an emulator. It is recommended to use a real device. You can refer to the React Native official website running-on-device for connecting a real device for debugging.
- Enable Developer Mode on the phone and turn on the USB Debugging switch.
- Connect the phone with a USB cable, it is recommended to choose the Transfering File option, do not choose the Charge Only option.
- After confirming the phone is successfully connected, execute npm run android to compile and run the project.
npm run android- Connect the phone with a USB cable and open the project ios directory with Xcode.
- Configure the signing information according to the running-on-device section on the React Native official website.
- Go to the ios directory and install dependencies.
cd ios
pod install- Go back to the root directory and execute npm run ios to compile and run the project.
cd ../
npm run ios1、When running npm run android and an error occurs as shown in the image, please reset the environment variables in the project root directory.

export ANDROID_HOME=$HOME/Library/Android/sdk
export PATH=$PATH:$ANDROID_HOME/emulator
export PATH=$PATH:$ANDROID_HOME/platform-tools
2、If executing the Build command in Xcode prompts an issue with the node environment variables, please proceed as follows:

cd ios
echo export NODE_BINARY=$(command -v node) > .xcode.envJoin a Tencent Cloud Chat developer group for Reliable technical support & Product details & Constant exchange of ideas.