Code Learning
As you have read on the homepage, I came from nothing when talking about code. I only knew some things about HTML/CSS, but didn't have any clue about JavaScript, D3, JSX, ES6, React, GitHub, the terminal and everything else. Because of this, I've learned very much the past 6 weeks. I followed the given lectures and did some courses myself. The tools I used and things I've learned are available here:
Because the lecture of Laurens was so good this week, with great examples and clear coding, I'm going to watch it again and practise with the code he used.
fetch("surveyData.json") .then(response => response.json()) .then(json => console.log(json));
I used this code to import the JSON file to my JS file. The console shows the data in all the arrays. Laurens showed this code in the lecture he gave. The fetch api provides a JavaScript interface for accessing and manipulating parts of the HTTP pipeline, following MDN sources.
var myObj = {
  prop1: "val1",
  prop2: "val2"
};
var prop1val = myObj.prop1; // val1
var prop2val = myObj.prop2; // val2
const getData = async (url) => {
const response = await fetch(url)
const data = await response.json()
return data}
getData('https://opendata.rdw.nl/resource/t5pc-eb34.json').then(data => {
const result = filterData(data, 'areaid')
console.log(result)
})
const filterData = (data, column) => {
return data.map(result => result[column])
}Als we fetch gebruiken moeten we even achten
Bij .then komt de data eruit
.then is keyword om uit te drukken: als data klaar is EN DAN resultaat
Opslaan van functie in variabele is niet optimaal.
getData wil je eigenlijk boven hebben
refacte
Refactoren en expanden: code op andere manier schrijven om overizhct te krijgen. Zelfe functionaliteiten op andere manier schrijven
onsole.log("Is it working?")

const endpoint = 'https://opendata.rdw.nl/resource/t5pc-eb34.json'

const getData = async (url) => {
    const response = await fetch(url)
    const data = await response.json()
    return data
}

getData(endpoint).then(data => {
    const result = filterData(data, 'areaid')
    console.log(result)
})

const filterData = (data, column) => {
    return data.map(result => result[column])
}
Optimalised:
onsole.log("Is it working?")

const endpoint = 'https://opendata.rdw.nl/resource/t5pc-eb34.json'

getData(endpoint).then(data => {
    const result = filterData(data, 'areaid')
    console.log(result)
})

async function getData(url){
    const response = await fetch(url)
    const data = await response.json()
    return data
}

const filterData = (data, column) => {
    return data.map(result => result[column])
}
function filterData(data, column) {
return data.map(result => result[column])
}Giving an endpoint through selectedColumn:
const endpoint = 'https://opendata.rdw.nl/resource/t5pc-eb34.json'
const selectedColumn = 'areaid'

getData(endpoint).then(data => {
    const result = filterData(data, selectedColumn)
    console.log(result)
})
TIP: Use
console.log()throughout the code to see what is happening.
getData(endpoint)
  .then(data => {
  console.log('all data: ', data)
  const result = filterData(data, selectedColumn)
  console.log(result)
})
Pick out 1 column:
getData(endpoint)
  .then(data => {
  console.log('all data: ', data)
  console.log('one datum: ', data[0])
  const result = filterData(data, selectedColumn)
  console.log(result)
})
Dataayyar: het eerste wat ik binnen krijg is dataArray
Benoeming van variabele is heel belangrijk
console.log("Is it working?")

const endpoint = 'https://opendata.rdw.nl/resource/t5pc-eb34.json'
const selectedColumn = 'areaid'

getData(endpoint)
  .then(rdwData => {
  console.log('all data: ', rdwData)
  console.log('one datum: ', rdwData[0])
  const result = filterData(rdwData, selectedColumn)
  console.log(result)
})

async function getData(url){
  const response = await fetch(url)
  const data = await response.json()
  return data
}

// Returns all values for a certain key in an array of data
function filterData(dataArray, key) {
  return dataArray.map(result => result[key])
}
Ophalen uit verschillende linkjes:
console.log("Is it working?")

const endpoint = 'https://opendata.rdw.nl/resource/t5pc-eb34.json'
const endpoint2 = 'https://opendata.rdw.nl/resource/t5pc-eb34.json'
const selectedColumn = 'areaid'

getData(endpoint)
  .then(rdwData => {
  console.log('all data: ', rdwData)
  console.log('one datum: ', rdwData[0])
  const result = filterData(rdwData, selectedColumn)
  console.log(result)
})

getData(endpoint2)
  .then(rdwData => {
  console.log('all data: ', rdwData)
  console.log('one datum: ', rdwData[0])
  const result = filterData(rdwData, selectedColumn)
  console.log(result)
})

async function getData(url){
  const response = await fetch(url)
  const data = await response.json()
  return data
}

// Returns all values for a certain key in an array of data
function filterData(dataArray, key) {
  return dataArray.map(result => result[key])
}
sync eruit, omgezet naar promises:
console.log("Is it working?")

const endpoint = 'https://opendata.rdw.nl/resource/t5pc-eb34.json'
const selectedColumn = 'areaid'

getData(endpoint)
	.then(result => {
  return result.json()
})
  .then(rdwData => {
  console.log('all data: ', rdwData)
  console.log('one datum: ', rdwData[0])
  const result = filterData(rdwData, selectedColumn)
  console.log(result)
})

function getData(url){
  return fetch(url)
}

// Returns all values for a certain key in an array of data
function filterData(dataArray, key) {
  return dataArray.map(result => result[key])
}
Begin van function
//Returns all uniques values in an array
function listUnique(dataArray){
  //Logica which finds unique values
	return uniqueArray
}
TIP!
Maak blueprint van de function:
//Beschrijven wat de functie gaat doen
function naam(parameter1, parameter2){
	//Hier komt daadwerkelijke functie
	return valuesOnlyPresentInArray1
}
Functie schrijven die lege arrays teruggeeft:
const emptyStringsInAreas = naam()Map aan het loggen waarin je niks retirn geeft array met undifened aan
forEach returnt niks, hij voert functie uit voor elk item dat hij tegenkomt
For loopje
Showen in console is "uitprinten"
Functies testen voordat het hem gebruikt en uitgaat van uitkomsten.
Terminologie kopje in wiki maken
Bovenin alles aanroepen en beneden function aangeven maakt het documet heel overzichtelijk
Terminologie
- Parameter: stukje informatie die een functie meekrijgt. Waarde van parameter kan veranderen
Map heeft 3 parameters: item, index, heler
ForEach
Eindcode
//stap 1haal data open van rdw
fetch(url)
// hier moet ik iets met .then doen
//stap 2 selecteer de data die ik interessant

//stap 3 schoon die data op

// Endpoint which returns locations of parking places, including area IDs
const endpoint = 'https://opendata.rdw.nl/resource/t5pc-eb34.json'
const endpoint2 = 'https://opendata.rdw.nl/resource/t5pc-e76b34.json'
const selectedColumn = 'areaid'

getData(endpoint)
	.then(result => {
  	return result.json()
})
 .then(RDWData => {
  	console.log("all data: ", RDWData)
  	console.log("one datum", RDWData[0])
  	const areaIdArray = filterData(RDWData, selectedColumn)
    const usageArray = filterData(RDWData, 'usageid')
		const uniqueUsageValues = listUnique(usageArray)
    console.log("Unique usage values:", uniqueUsageValues)

  	const uniqueAreaValues = listUnique(areaIdArray)
    console.log("Unique area values:", uniqueAreaValues)

  	const emptyStringsInAreas = countValuesInArray(areaIdArray, "")
    console.log("empty strings in area ids", emptyStringsInAreas)

  	// console.log(usageArray, areaIdArray)
})

// Fetches data from a url
function getData(url){
  return  fetch(url)
}

// Returns all values for a certain key in an array of data
function filterData(dataArray, key){
  return dataArray.map(item => item[key])
}

// Returns all unique values in an array
function listUnique(dataArray){
  //logica which finds unique values
  let uniqueArray = []
  dataArray.forEach(item => {
    if (uniqueArray.indexOf(item) == -1)
    {
      uniqueArray.push(item)
    }
  })
  return uniqueArray
}

// Compares two arrays and returns the values that ARe present in array1 but not in array2
function compareArray(array1, array2){
  //Some code here that compares two arrays
	return valuesOnlyPresentInArray1
}

// Returns the number of times a value is present in an array
function countValuesInArray(valueArray, specificValue){
  let count = 0
  valueArray.forEach(item => {
    if (item == specificValue){
      count ++
    }
  })
  return count
}
parametrers
Variabelen die alleen binnen die specifieke function gebruikt kunnen worden
Wanneer je de function aanroept, kan je die arguments meegeven die gelinkt worden aan de parameters
coderen('code')

function coderen(x){
	console.log('ik hou van ' + x)
}
Print in console: ik hou van code
Return value
Interactie in D3
Algemene tips
- Statische visualisatie moet vandaag af, dan willen we daarna interactie gaan toevoegen
- States
- Events
- Interaction
Gotchas
- Alles kan je met CSS manipuleren. Je kan hover, active en focus etc gewoon gebruiken
- SVG elementen
- Is wel een "goedkope" manier
- ATTR gebruiken om te stylen
- Titel en tekst aan SVG toevoegen
- Functies die we ook in javascript hebben gebruikt. Eventlistener > je kan referenen naar elementen
- Combineren van functies, attr en CSS:


.transition( ) gebruiken voor auto-animate effect
- Animation met D3.transition
- Interpolate: als iets boven 5 is wordt het groen bijv
- CSS cursors aanpassen voor duidelijk interactie gevoel
API (Application Programming Interface): exposes data from a database & gives you a response.
REST: Representational State Transfer > ontvangen we als JSON
SYNC vs. ASYNC
Kost tijd om data uit database te halen
SYNC: allemaal achter elkaar
ASYNC: trim> begint met laden van volgende data wanneer die van daarvoor nog bezig is
Promises: van zichzelf async (can only succeed or fail once)
ASYNC/AWAIT: alleen gebruiken als promise duidelijk is
Error handling: make sure you handle errors
-
console printingis logging code to the console.
Because I'm new to the Tech-world, I need to exercise a lot with the different types of languages. On the TechTrack site are a few recourses available that I'm going to use.
Things I learned in the first 2 days Languages we use:
-
HTML(comfortable) -
CSS(comfortable) -
JS(I know the basics) -
MD(new for me) -
NPM(new for me)
Recourses:
- Markdown Basics link
Commands for the Terminal I learned:
-
pwd(place where the terminal is on that moment) -
ls(list of all items in current directory) -
cd(change directory) -
clear(move written commands upwards) -
mkdir/rmdir(make/remove directory) -
touch(create files >touch index.htmlfor example) -
rm(remove) git add .git commit -m '<message>'git pushgit pull
- Functions are values
- NaN means "Not a Number"
- camelCase: spell each word with capital first-letter except the first word
What are higher functions good for?
Composition > small functions into other functions Call-back functions
Filter will loop trough each item of the array You can use the function "find" to get a result of 1 array.
Today I'm going to exercise the basics of JavaScript on freeCodeCamp
You can easily increment or add one to a variable with the ++ operator.
i++;
is the equivalent of
i = i + 1;
var myVar = 87;
// Only change code below this line
myVar++;
result = 88
myVar—;
Result 86
Zero-based indexing [0]
multi-dimensional array > object1, 13], [object2, 26
.push() takes one or more parameters and "pushes" them onto the end of the array.
// Setup
var myArray = [["John", 23], ["cat", 2]];

// Only change code below this line
myArray.push(["dog", 3])
.unshift aadds the eleent at the beginning of the array
.pop() is used to "pop" a value off of the end of an array. We can store this "popped off" value by assigning it to a variable. In other words, .pop() removes the last element from an array and returns that element.
pop() always removes the last element of an array. What if you want to remove the first?
That's where .shift() comes in. It works just like .pop(), except it removes the first element instead of the last.
You can call or invoke this function
Parameters are variables that act as placeholders for the values that are to be input to a function when it is called. When a function is defined, it is typically defined along with one or more parameters. The actual values that are input (or "passed") into a function when it is called are known as arguments.
Here is a function with two parameters, param1 and param2:
function testFun(param1, param2) {
  console.log(param1, param2);
}
Then we can call testFun: testFun("Hello", "World"); We have passed two arguments, "Hello" and "World". Inside the function, param1 will equal "Hello" and param2 will equal "World". Note that you could call testFun again with different arguments and the parameters would take on the value of the new arguments.
functionWithArgs(1, 2)

function functionWithArgs(param1, param2){
    console.log(param1 + param2);
}
Console print looks like: 3
Different kinds of variables:
var, const, let
Var: Variables which are used without the var keyword are automatically created in the global scope.
Global variable inside a function
Argument roept parameter aan
== zegt dat 3 en '3' true zijn
=== zeg dat 3 en 3 true zijn
! = not equal
! ==
= Equal or greather than
pseudocode = 'Pseudo' betekent onecht, 'code' verwijst naar de broncode van een computerprogramma. Doordat pseudocode een informeel karakter heeft, is het niet geschikt om gecompileerd en uitgevoerd te worden.
Give values to an empty string in a variable with switch, case and break
function caseInSwitch(val) {
  var answer = "";

  switch (val){
    case 1:
      answer = "alpha";
      break;
    case 2:
      answer = "beta";
      break;
    case 3:
      answer = "gamma";
      break;
    case 4:
      answer = "delta";
      break;
    }

  return answer;
}

console.log(caseInSwitch(1));
When you don't use the break code, the print will always be delte because the console will read that one last.
function sequentialSizes(val) {
  var answer = "";
  switch(val){
    case 1:
    case 2:
    case 3:
      answer = "Low";
      break;
    case 4:
    case 5:
    case 6:
      answer = "Mid";
      break;
    case 7:
    case 8:
    case 9:
      answer = "High";
      break;
  }
  return answer;
}

console.log(sequentialSizes(2));
The following code can be made easier:
function isEqual(a,b) {
  if (a === b) {
    return true;
  } else {
    return false;
  }
}
function isEqual(a,b) {
return a === b;
}Because we use booleans, the return is false or true anyway. This is why we dont need to write this out with if else.
This was an example from freeCodeCamp. The code they give me to clean up was the following code:
function isLess(a, b) {
  if (a < b) {
    return true;
  } else {
    return false;
  }
}

console.log(isLess(10, 15));
function isLess(a, b) {
return (a < b)
}
console.log(isLess(8, 15)); //outcome is true
console.log(isLess(17, 15)); //outcome is falseObjects are similar to arrays, except that instead of using indexes to access and modify their data, you access the data in objects through what are called properties.
var cat = {
  "name": "Whiskers",
  "legs": 4,
  "tails": 1,
  "enemies": ["Water", "Dogs"]
};
There are two ways to access the properties of an object: dot notation (.) and bracket notation ([]), similar to an array.
var myObj = {
  prop1: "val1",
  prop2: "val2"
};
var prop1val = myObj.prop1; // val1
var prop2val = myObj.prop2; // val2
var testObj = {
12: "Namath",
16: "Montana",
19: "Unitas"
};
var playerNumber = 16;
var player = testObj[playerNumber];
console.log(playerNumber); // 16
console.log(player); // MontanaAdd properties by just typisch myDog.bark = "...". delete properties with delete myDog.bark
function phoneticLookup(val) {
  var result = "";

    var lookup = {
      "alpha": "Adams",
      "bravo": "Boston",
      "charlie": "Chicago",
      "delta": "Denver",
      "echo": "Easy",
      "foxtrot": "Frank",
    }

    result = lookup[val]

  return result;
}

console.log(phoneticLookup("bravo"));
Feedback repo's algemeen:
- Veel onderzoeksvragen over elektrische auto's, liever wat originelers doen
- Concepten en schetsen heb ik nog niet. Niet naar standaard kaarten als visualisaties doen. Lekker ontwerpen!!!
- Zet bij API goed wat voor type data eruit komt
- Engels correct typen.
Feedback Sam
In this videos we will practise with a few different Higher Order Functions
All this functions are based on list-transformation. They turn your list into something else.
Example of a basic function:
console.log('Fun Fun Function')

var triple = function(x){
    return x*3
}

var waffle = triple
console.log(waffle(30))
Result in console = "90"
Exercise filtering data
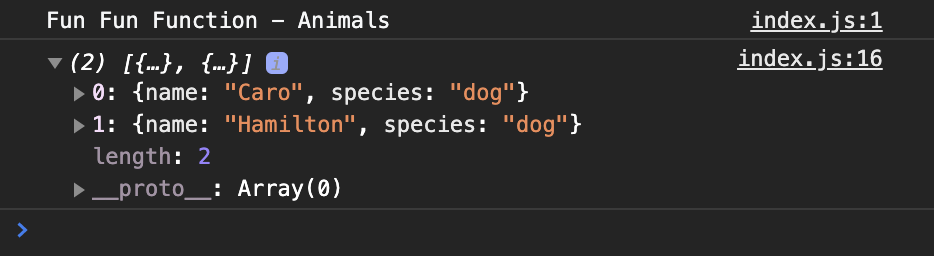
First I made this variable with an array. It contains the kind of animal and a name that is given by each animal.
console.log('Fun Fun Function - Animals')

var animals = [
    {name: 'Fluffykins',    species: 'rabbit'},
    {name: 'Caro',          species: 'dog'},
    {name: 'Hamilton',      species: 'dog'},
    {name: 'Harold',        species: 'fish'},
    {name: 'Ursula',        species: 'cat'},
    {name: 'Jimmy',         species: 'fish'},
]
The code we will use to filter the dogs out of the complete array would look like this:
var dogs = animals.filter(function(animal){
    return animal.species === 'dog'
})
The second codeline is easy to understand because the system will look for the species with the name 'dog'. === means equal value and equal type (source)
You can split the code in two seperete parts. That will look like this:
var isDog = function(animal){
    return animal.species === 'dog'
}

var dogs = animals.filter(isDog)
The var isDog is just a function that checks of an object is a dog. It had nothing to do with filtering yet. The var dogs will handle the filtering of the object.
It's also possible to do the exact opposite. By this I mean filtering all the objects except the dogs. You can use the "reject" in stead of "filter".
var otherAnimals = animals.reject(isDog)So what are we seeing when we console.log the "dogs" variable? This is what will appear in the console:
But now I just want to see the name of the dogs. How could we do this?
First I tried this method. But it didn't work because it will not select the parts within the arrays of the name and species. But it will look for the entire codeline. First I thought it will pick only the "name" of the array because I've set "0" in the codeline.
console.log(dogs.slice(0))To come up with a good codeline, I am writing exactly what I want the code to do:
From the variable "animals" I want to show the "name" of the "species" that are equal to "dog".
I asked Chelsea Doeleman to help me out. She came with the next code:
console.log(dogs.map(dog => dog.name))With this codeline, the browser will loop all dogs and will only show the names next. So this is what you'll see in the console:

Also like a "filter", map goes through an array. But unlike "filter" it doesn't throw the objects away, instead it transforms them. We will use the same animals array as in part 1. Because "map" is also a function on the array object, we can use it like this:
var names = animal.map()To get al the names visual in the console, the following code is required:
var names = animals.map(function(animal){
return animal.name
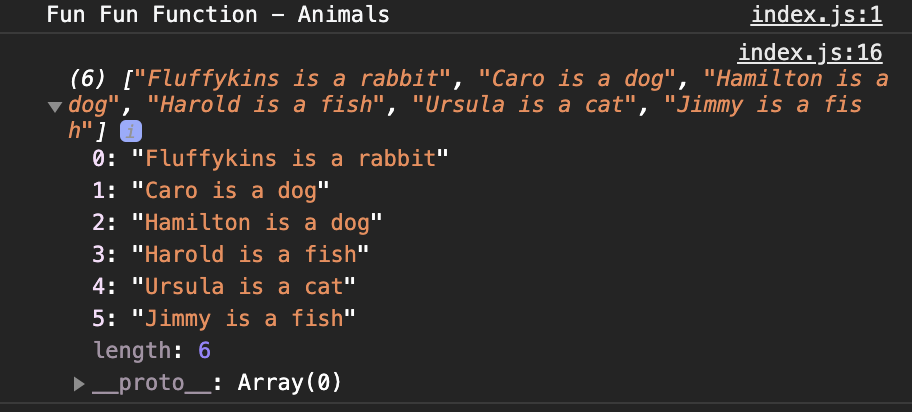
})U can expend the code a little bit by adding the next couple of things
var names = animals.map(function(animal){
    return animal.name + ' is a ' + animal.species
})
Then what you would see in the console is:
It can be easier by using arrow functions. It works like this:
var names = animals.map((animal) => animal.name)An method you can use for different kind of actions. In the example from the video we used "reduce" and "sum" to sum up all the amount values.
var orders = [
    { amount: 250 },
    { amount: 400 },
    { amount: 100 },
    { amount: 325 }
]

var totalAmount = orders.reduce((sum, order) => sum + order.amount, 0)

console.log(totalAmount);
In the console we will see the total sum of 1075.
Canvas works with pixels and SVG (Scalable Vector Graphics) works with math. SVG, also called a vector, is that it can be endlessly big.
XML-based: looks like html Works with CSS
Code example
<circle
  cx="120"
  cy="120"
  r="100"
/>
Most of the time, you don't have to make all the shapes by yourself, but D3 will do it for you.
Things to keep in mind while coding D3:
- The order of elements matter
D3.js is a JavaScript library for manipulating documents based on data. D3 helps you bring data to life using HTML, SVG and CSS.
Example: make a bar chart the color of the eyes that are shown in the data.
At this moment, D3@6 is the newest version. Always check the version of D3 in your data.
To get know with the functions of D3, I started to exercise with a video from Curran Kelleher, called Let's Make a Face!
import { select } from 'd3';

const svg = select('svg');
svg.style('background-color', 'red');
We're going to write code about the size and position of the circle we make. This is possible in very much different ways. To see the difference between the methods, I've wrote them down: Option 1
circle.attr('r', 500/2);
circle.attr('cx', 960/2);
circle.attr('cy', 500/2);
Giving value to individual lines.
Option 2
const width = 960;
const height = 500;

circle.attr('r', height/2);
circle.attr('cx', width/2);
circle.attr('cy', height/2);
Create variables so you can change the values faster when you're working on a bigger project.
Option 3
Because we already have this line of code in our HTML <svg width="960" height="500"></svg> we can give that value to our variables. It's defined already in HTML, so we don't need to define it another time in JS.
const width = svg.attr('width');
const height = svg.attr('height');

circle.attr('r', height/2);
circle.attr('cx', width/2);
circle.attr('cy', height/2);
width and height are both strings at the moment. So to change theme into numbers, you can add parseFloat(). But it's easier to add a + before the svg, this will also turn the string intro a number. It would look something like this:
const width = +svg.attr('width');
const height = +svg.attr('height');

circle.attr('r', height/2);
circle.attr('cx', width/2);
circle.attr('cy', height/2);
We see in the code three times the circle.attr. When we use the method chain, the code will look something like this:
const circle = svg.append('circle')
  .attr('r', height/2)
  .attr('cx', width/2)
  .attr('cy', height/2);
On this way, we can give a lot more values to the circle. For example a fill and stroke:
const circle = svg.append('circle')
  .attr('r', height/2)
	.attr('cx', width/2)
	.attr('cy', height/2)
	.attr('fill', 'yellow')
	.attr('stroke', 'black');
D3 had a lot of functions in it. You need to import them when you want them to use. So for this example, we need the "arc" function. This is the link of D3js.org.
The total code will look
// import the d3 possibilities
import { select, arc } from 'd3';

// Pick the SVG element from HTML
const svg = select('svg');

// Control the width and height with one variable
const width = +svg.attr('width');
const height = +svg.attr('height');

const g = svg.append('g')
	.attr('transform', `translate(${width/2}, ${height/2})`);

// Big, yellow circle
const circle = g.append('circle')
  .attr('r', height/2)
	.attr('fill', 'yellow')
	.attr('stroke', 'black');

// Eye variables
const eyeSpacing = 80;
const eyeYOffset = -50;
const eyeRadius = 30;
const eyebrowWidth = 60;
const eyebrowHeight = 15;

const eyesGroup = g.append('g')
	.attr('transform', `translate(0, ${eyeYOffset})`);

const leftEye = eyesGroup.append('circle')
  .attr('r', eyeRadius)
	.attr('cx', - eyeSpacing)

const rightEye = eyesGroup.append('circle')
  .attr('r', eyeRadius)
	.attr('cx', + eyeSpacing)

const leftEyebrow = eyesGroup.append('rect')
	.attr('x', -eyeSpacing - eyebrowWidth/2 )
	.attr('y', -60)
	.attr('width', eyebrowWidth)
	.attr('height', eyebrowHeight);

const rightEyebrow = eyesGroup.append('rect')
	.attr('x', eyeSpacing - eyebrowWidth/2 )
	.attr('y', -60)
	.attr('width', eyebrowWidth)
	.attr('height', eyebrowHeight);

const mouth = g.append('path')
	.attr('d', arc()({
    innerRadius: 120,
  	outerRadius: 150,
  	startAngle: Math.PI / 2,
  	endAngle: Math.PI * 3 / 2
        })
)Defining visualisation; computer-based visualization systems provide visual representaion of datasets designed to help people carry out tasks more effectively.
Why: visualisation is
...
With making a bbar chart, I'm going to practise with D3 data joins, scales and axes. Also:
- Representing a data table in JavaScript
- Creating rectangles for each row
- Using linear and band scales
- The margin convention
- Adding axes
CSV stands for Comma Separated Value
Copied and paste the following small dataset in a data.csv file
country,population
China,1415046
India,1354052
United States,326767
Indonesia,266795
Brazil,210868
Pakistan,200814
Nigeria,195875
Bangladesh,166368
Russia,143965
Mexico,130759
D3 has a function that is able to import a csv file:
// import the d3 possibilities
import { select, csv } from 'd3';

csv('data.csv').then(data => {
	console.log(data);
});
Its a http request that loads the csv string from data.csv. It also makes it a array of object.
But now the population object is a string, so to transform it to a number we can add the following line of code
sv('data.csv').then(data => {
// make it a number
  data.forEach(d => {
    d.population = +d.population;
  });

	console.log(data);
});With the following codeline, we make all the rectangles
const render = data => {
	svg.selectAll('rect').data(data)
  .enter().append('rect')
  	.attr('width', 300)
    .attr('height', 300)
};
It will look like there's only 1 rectangle


But when you open op the inspector, you can see that there is a rectangle for each object. The problem now is that they are having the exact same position values.


The D3-function we're going to add in the import code-line is: scaleLiner

Domain: Data space
Range: Screen space
D3 "max"-function
I also import "max" which is a D3-function that automatically generates the heighest number for example.
const xScale = scaleLinear()
  .domain([0, max(data, d => d.population)]);

console.log(xScale.domain())

// console print: [0, 1415046000]
// it will print the minimum that we've set and the max of the data from the csv file
Now at the .range( ) to give an ratio to the charts
const render = data => {
  const xScale = scaleLinear()
  	.domain([0, max(data, d => d.population)])
  	.range([0, width]);

console.log(xScale.range())

// console print: [0, 950]
It has to start at zero with a bar chart and we can add "width" to give it the scale we gave to that variable.
⇒ is one row
Now, we want each bar to have it's own width that scales correct with the data from the CSV file.
// previous code

svg.selectAll('rect').data(data)
  .enter().append('rect')
  	.attr('width', 300)
    .attr('height', 300)
// new code
svg.selectAll('rect').data(data)
.enter().append('rect')
.attr('width', d => xScale(d.population))
.attr('height', 300)So in this code, we don't want a fixed width but a width that is adjusting to the range.

Now we want the bars to have a better position so you can each individual.
We add the "scaleband" D3-function to do this

Here we want our domain to be our country. So we let him map each row looking for the value in the object "country"
const yScale = scaleBand()
  	.domain(data.map(d => d.country))

  console.log(yScale.domain());

// Consolte print: "China", "India", "United States" etc.
Also the heights need to be adjusting to the given value. It doesn't be fixed.
svg.selectAll('rect').data(data)
  .enter().append('rect')
  	.attr('width', d => xScale(d.population))
    .attr('height', 300)
So we change the value of 300 in the codeline to:
.attr('height', yScale.bandwidth())Bandwith is the width of each bar individual. Now we have all the individual lines, but they still have the exact same Y-position.
 So let's change the Y-value.
// svg.selectAll('rect').data(data)
//  .enter().append('rect')
  	.attr('y', d => yScale(d.country))
//  	.attr('width', d => xScale(d.population))
//    .attr('height', yScale.bandwidth())
};
There's no styling yet.
This is the total code that I have until now:
// import the d3 possibilities
import { select, csv, scaleLinear, max, scaleBand } from 'd3';

// Pick the SVG element from HTML
const svg = select('svg');

// Control the width and height with one variable
const width = +svg.attr('width');
const height = +svg.attr('height');

const render = data => {
  const xValue = d => d.population;
  const yValue = d => d.country;

  const xScale = scaleLinear()
  	.domain([0, max(data, xValue)])
  	.range([0, width]);

  const yScale = scaleBand()
  	.domain(data.map(yValue))
  	.range([0, height]);

	svg.selectAll('rect').data(data)
  .enter().append('rect')
  	.attr('y', d => yScale(yValue(d)))
  	.attr('width', d => xScale(xValue(d)))
    .attr('height', yScale.bandwidth())
};

// Binnenhalen van CSV data
csv('data.csv').then(data => {
// Omzetten van strings naar numbers
// vermenigvuldigen met 1.000 voor kloppende cijfers
  data.forEach(d => {
    d.population = +d.population * 1000;
  });
	render(data);
});Adding axes
const yAxis = axisLeft(yScale);
yAxis(g.append('g'));
g.append('g').call(axisLeft(yScale));
const yScale = scaleBand() .domain(data.map(yValue)) .range([0, innerHeight]) .padding(.1);
Add padding for space between the bars
Quick navigation:
So what is the meaning of a framework? What does it do? How does it works?
By doing my research I came across very much recourses that talked about a framework as well as a library. So what are the differences between these two things?
A library is a set of code that was previously written, that can be called upon when building your own code (source). Works very good for reusability which is very important inside coding.
A framework is a supporting structure when your own code defines the "meat" of the operations by filling out the structure. The framework dictates how your project will be structured.
I came across a language that is called regular expressions. It's a method to select some type of characters in a way that I've not seen before. Regular expressions are extremely useful for matching common patterns of text such as email addresses, phone numbers, URLs, etc. Almost every programming language has a regular expression library (source).
Frameworks
- Vue
- Svelte
- Angular
- Django
- Rails
- Express
Libraries
- React
- JQuery
- Lodash
- Redux
Well, probably not. But let's try it 😄
After doing some research about the meaning of frameworks, I still didn't know exactly what it is good for and why I should use it. So Ralf Zonneveld send a course to me about React that I'm going to watch to expend my knowledge about the React framework.
Navigate easy to the things I've learned with this course:
Beside there great things I've learned by watching the course, I also practised really good with error handling. I've had many errors while writing the code and it was a great challenge for me to read the errors that came up and clear them.
First I've added the Google Chrome extension "React Developer Tools" so I can see if websites are using React. With the tool I can inspect these elements.
Within the terminal I can download this by using the following code-line: sudo nom install -g create-react-app
With using the -g we made sure that React is installed globally so we can use it in every project we want.
I made a directory where I called the create-react-app so it installed React in that place. After that I've set npm start and it made a localhost:3000 where React was running on. In my package.json I can see the version of the React I installed.
    "react": "^17.0.1",
    "react-dom": "^17.0.1",
    "react-scripts": "4.0.0",
This version is more recent then the one that is used in the course, so hopefully this is not a problem. Version used in the course:
    "react": "^16.5.2",
    "react-dom": "^16.5.2",
    "react-scripts": "2.0.5",
We work in the src directory inside the files.
// Import React to use the functions
import React from 'react'
import ReactDOM from 'react-dom'


const title = React.createElement(
    'h1',
    {id: 'title', className: 'header'},
    'Hello World'
)

ReactDOM.render(
    //WHAT do we want to render
    title,
    //WHERE do we want it to render
    document.getElementById('root')
)
Now I'm going to add a style to the title, but I want to keep the code clear and clean. So to do that, I make a separate variable to define this values. This looks almost the same as CSS but it's written within a JS file.
var style = {
    backgroundColor: 'orange',
    color: 'white',
    fontFamily: 'Arial',
    fontSize: '3em'
}
To add this style to the title, we can add the var style to the style of the element:
{id: 'title', className: 'header', style: style},This is what I've made with the code:

With the React.createElement it's very easy to make elements en customise them. But let's find out how we can improve these lines of code to a more simplified code.
Old:
const title = React.createElement(
    'ul',
    {id: 'title', className: 'header', style: style},
    React.createElement(
        'li',
        {},
        'item on our list'
    )
)
New: As you can see we can use tag-based syntax (like HTML) in the JS file
ReactDOM.render(
    <div style={style}>
        <h1 id="heading-element">Hello World</h1>
        <p>We're glad you're here!</p>
    </div>,
    document.getElementById('root')
)"Component based structure is the reason why React is so populair. We can create an UI by creating and nesting a collection of component." Let's find out what this all means.
render()is one of the most important things within a component because it describes what we want to render the the DOM. Also, all the components need to be capitalised.
Using the component-method, we have a whole other code again, but showing the same message:
import React from 'react'
import ReactDOM from 'react-dom'

class Message extends React.Component {
    render(){
        return(
            <div>
                <h1>Hello World</h1>
                <p>We're glad you're here!</p>
            </div>
        )
    }
}

ReactDOM.render(<Message />, document.getElementById('root'))We can make the message dynamic by using React Props. The code will then look like:
import React from 'react'
import ReactDOM from 'react-dom'

class Message extends React.Component {
    render(){
        return(
            <div>
                <h1 style={{color: this.props.color}}>
                    {this.props.msg}
                </h1>
                <p>I'll check back in {this.props.minutes} minutes</p>
            </div>
        )
    }
}

ReactDOM.render(
    <Message color="blue" msg="how are you?" minutes={5}/>,
    document.getElementById('root')
)
This is what we'll see:

Importing elements does make the code a little bit cleaner. If we import component like this:
import React, { Component } from 'react'. We can changeReact.Componentto justComponent.
Counter code:
import React, { Component } from 'react'
import { render } from 'react-dom'

console.log('File is running');

let sportData = {
    total: 70,
    powder: 20,
    backcountry: 10,
    goal: 100
}

class SportDayCounter extends Component {
    getPercent = decimal => {
        return decimal * 100 + "%"
    }

    calcGoalProgress = (total, goal) => {
        return this.getPercent(total/goal)
    }

    render(){
        const {total, powder, backcountry, goal} = this.props
        return(
            <section>
                <div>
                    <p>Total days: {total}</p>
                </div>
                <div>
                    <p>Powder days: {powder}</p>
                </div>
                <div>
                    <p>Backcountry days: {backcountry}</p>
                </div>
                <div>
                    <p>Goal: {this.calcGoalProgress(total, goal)}</p>
                </div>
            </section>
        )
    }
}

render(
    <SportDayCounter
        total={sportData.total}
        powder={sportData.powder}
        backcountry={sportData.backcountry}
        goal={sportData.goal}/>,
    document.getElementById('root')
)We can put the components out of the class to make it a function. Now it gets seperated from the class and you can use it on more places:
import React, { Component } from 'react'
import { render } from 'react-dom'

console.log('File is running');

let sportData = {
    total: 70,
    powder: 20,
    backcountry: 10,
    goal: 100
}

const getPercent = decimal => {
    return decimal * 100 + "%"
}
const calcGoalProgress = (total, goal) => {
    return getPercent(total/goal)
}

const SportDayCounter = ({total, powder, backcountry, goal}) => {
    return (
        <section>
                <div>
                    <p>Total days: {total}</p>
                </div>
                <div>
                    <p>Powder days: {powder}</p>
                </div>
                <div>
                    <p>Backcountry days: {backcountry}</p>
                </div>
                <div>
                    <p>Goal: {calcGoalProgress(total, goal)}</p>
                </div>
        </section>
    )
}

render(
    <SportDayCounter
        total={sportData.total}
        powder={sportData.powder}
        backcountry={sportData.backcountry}
        goal={sportData.goal}/>,
    document.getElementById('root')
)It's a strong function that we can render a component multiple times. But simply put them two times inside the render call, we'll get an error. So this is not possible:
render(
    <Library />,
    <Library />,
    document.getElementById('root')
)
But this will work:
render(
    <div>
        <Library />
        <Library />
    </div>,
    document.getElementById('root')
)
We can also call a component inside another component. With this we can repeat a particular pattern.
import React, { Component } from 'react'
import { render } from 'react-dom'

console.log('File is running');

const Book = ({title, author, pages}) => {
    return (
        <section>
            <h2>{title}</h2>
            <p>By: {author}</p>
            <p>Pages: {pages}</p>
        </section>
    )
}

const Library = () => {
    return (
        <div>
            <Book title="Davinci Code" author="Dan Brown" pages={364}/>
            <Book title="Het Bernini Mysterie" author="Dan Brown" pages={412}/>
            <Book title="Oorsprong" author="Dan Brown" pages={334}/>
        </div>
    )
}

render(
    <Library />,
    document.getElementById('root')
)
This code will show this in the browser:

But in a real-world-scenario we have an array dataset with all the data we want to use. So to use a data from an array, we can use this code:
import React, { Component } from 'react'
import { render } from 'react-dom'

let bookList = [
    {"title": "Davinci Code", "author": "Dan Brown", "pages": 364},
    {"title": "Het Bernini Mysterie", "author": "Dan Brown", "pages": 412},
    {"title": "Het Bernini Mysterie", "author": "Dan Brown", "pages": 412}
]

console.log('File is running');

const Book = ({title, author, pages}) => {
    return (
        <section>
            <h2>{title}</h2>
            <p>By: {author}</p>
            <p>Pages: {pages}</p>
        </section>
    )
}

const Library = ({books}) => {
    return (
        <div>
            {books.map(
                (book, i) =>
                    <Book
                        key={i}
                        title={book.title}
                        author={book.author}
                        pages={book.pages}/>
            )
            }
        </div>
    )
}

render(
    <Library books={bookList} />,
    document.getElementById('root')
)
A few things about this new line of code:
- There's made a new variable with all the data inside of it, just like a regular dataset.
-
const Book = ()has stayed the same. This is because we still want the same elements to be visual in the browser. - The Higher Order Function
books.map()is used to map each object in the bookList array. - The
key={i}is used to prevent an error that says that each child in an array should have a unique "key" prop.
Change the ... from a component to a ES6 class.
This line of code is a true/false state: {this.state.open ? "open" : "closed"}. It actually says: if this.state.open = true then show "open", if not : return "closed"